
Let’s get started with making your online payments easier. Say goodbye to clunky payment forms and welcome modern payments with Stripe.
Stripe is the ultimate payment platform for businesses looking to take their online payments to next level. With Stripe, you can easily accept and process payments from customers, manage subscriptions and handle all sort of transactions with ease.
But how to integrate Stripe in web applications? To get started, all you need is a Stripe account and your Stripe API keys. How to set up your Stripe account with Spring-boot backend implementation, please visit our Stripe Implementation in Spring Boot post.
Setting up Angular application
So, let’s start with app.module.ts file. We have to import HttpClientModule that provides an HTTP client service for making HTTP requests to a server. Once HttpClientModule is imported, we can use inject HttpClient service into our component.
					import { NgModule } from '@angular/core';
import { BrowserModule } from '@angular/platform-browser';
import { AppRoutingModule } from './app-routing.module';
import { AppComponent } from './app.component';
import { HttpClientModule } from '@angular/common/http';

@NgModule({
  declarations: [AppComponent],
  imports: [BrowserModule, AppRoutingModule, HttpClientModule],
  bootstrap: [AppComponent],
})
export class AppModule {}
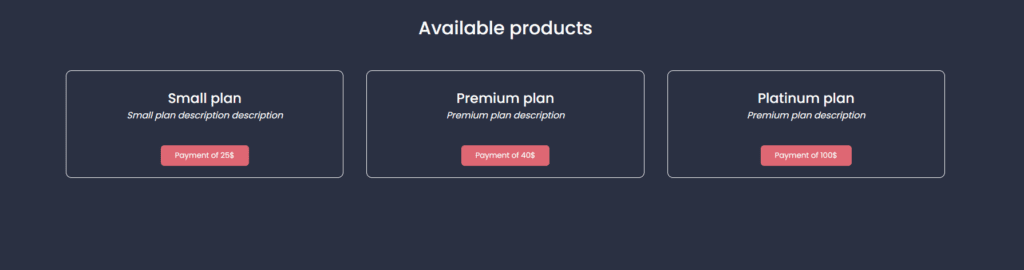
So, we can start with creating an HTML template. It will contain three cards which represent our products and pop up message that will be displayed based on payment success. We modified the appearance of the elements by adding some styling.
					<div class="payment-message"> {{ paymentMessageText }} </div>

<div>
  <h1>Available products</h1>
  <div class="products">
    <div class="product__card">
      <h2 class="product-name">{{ product.name }}</h2>
      <p class="product-description">{{ product.description }}</p>
      <button class="product-payment-button"> Payment of {{ product.amount }}$ </button>
    </div>
  </div>
</div>
After creating our HTML template, we can start with Stripe checkout configuration in app.component. Stripe should be invoked on app.component initialization. It checks existence of stripe-script element and if there is no stripe-script, the invoke method will create a new script element. Source of the script is checkout.js script from official Stripe website.
After configuring the script, we have to provide our key which was generated in our Stripe account. To interact with HTML template, we have to bind initializePayment method to payment button. InitializePayment method is calling StripeCheckout method to process a payment. PaymentHandler is first configured with the Stripe API key that was previously mentioned and token callback method that calls processPayment method with the product and stripeToken as arguments. PaymentHandler is then opened with product name, description and amount which will be paid.

After completion of Stripe checkout form, stripeToken is generated and processPayment method is called. In processPayment method we make a HTTP request to Spring Boot backend and show message depends on success of the payment.
					import { HttpClient } from '@angular/common/http';
import { Component } from '@angular/core';

@Component({
  selector: 'app-root',
  templateUrl: './app.component.html',
  styleUrls: ['./app.component.scss'],
})
export class AppComponent {
  private paymentHandler: any = null;
  public paymentMessageShown: boolean = false;
  public paymentMessageSuccess: boolean = false;
  public paymentMessageText: string = null;
  public productList: any[] = [
    {
      name: 'Small plan',
      amount: 25,
      description: 'Small plan description description',
      currency: 'USD',
    },
    {
      name: 'Premium plan',
      amount: 40,
      description: 'Premium plan description',
      currency: 'USD',
    },
    {
      name: 'Platinum plan',
      amount: 100,
      description: 'Premium plan description',
      currency: 'USD',
    },
  ];

  constructor(private http: HttpClient) {}

  ngOnInit() {
    this.invokeStripe();
  }

  public initializePayment(product: any) {
    const paymentHandler = (window).StripeCheckout.configure({
      key: 'pk_yourKey',
      locale: 'auto',
      token: (stripeToken) => {
        this.processPayment(product, stripeToken);
      },
    });

    paymentHandler.open({
      name: product.name,
      description: 'Charge with stripe api',
      amount: product.amount * 100,
    });
  }

  private processPayment(product: any, stripeToken: any) {
    this.http
      .post('path_to_backend', {
        description: product.description,
        amount: product.amount * 100,
        currency: product.currency,
        stripeToken: stripeToken.id,
      })
      .subscribe(
        (data) => {
          this.paymentMessageShown = true;
          this.paymentMessageSuccess = true;
          this.paymentMessageText = 'Payment was successfull';
          setTimeout(() => {
            this.paymentMessageShown = false;
          }, 4000);
        },
        (error) => {
          this.paymentMessageShown = true;
          this.paymentMessageSuccess = false;
          this.paymentMessageText = error.error.message;
          setTimeout(() => {
            this.paymentMessageShown = false;
          }, 4000);
        }
      );
  }

  private invokeStripe() {
    if (!window.document.getElementById('stripe-script')) {
      const script = window.document.createElement('script');
      script.id = 'stripe-script';
      script.type = 'text/javascript';
      script.src = 'https://checkout.stripe.com/checkout.js';
      script.onload = () => {
        this.paymentHandler = (window).StripeCheckout.configure({
          key: 'pk_yourKey',
          locale: 'auto',
        });
      };
      window.document.body.appendChild(script);
    }
  }
}
Conclusion
In conclusion, integrating Stripe into an Angular application is a simple process that involves setting up an account and API keys, importing the necessary modules and components, and configuring the Stripe checkout process. The Stripe Angular library provides useful functions and components that make it easy to set up secure payment processing in your app. Additionally, Stripe’s comprehensive documentation and support resources make it easy to troubleshoot any issues that may arise during the implementation process. Overall, Stripe is a powerful and reliable platform for building modern payment systems in Angular applications.