
If you’re running an e-commerce site or any other kind of online business, you know that accepting payments from your customers is crucial. And if you’re using the Spring Boot framework, you’ll be happy to know that integrating with a payment processor like Stripe is a breeze.
Stripe is a popular payment processing platform that provides a range of tools and services for businesses to easily accept and manage payments online. Some of the key features of Stripe include support for a variety of payment methods, advanced fraud protection measures, and a range of APIs (including the Charge API, Checkout API, and PaymentIntent API) that allow developers to easily integrate payment processing into their own applications.
In this post, we’ll show how to implement three different Stripe APIs into the Java Spring Boot project.
Stripe API keys
First, you’ll need to sign up for a Stripe account and obtain your API keys. You can use Stripe in test mode to simulate the transaction with test cards.
When you sign up for a Stripe account, you’ll be given a set of API keys: a “test” key and a “live” key. As the names suggest, the test key is used for testing purposes, while the live key is used in production.
So, how do you get your hands on these keys? Just follow these steps:
- Go to https://stripe.com and click “Sign up” in the top right corner.
- Fill out the form to create a new Stripe account.
- Once your account is created, click on the “Developers” tab in the top menu. Don’t forget to turn on Test mode first.
- Click on “API keys” in the left sidebar. You’ll see your test keys listed on this page.
Now that you have your test key, you can start integrating Stripe into your Java Spring project.
Setting up spring project
To use Stripe API in Java Spring application you need to add a dependency to your pom.xml:
					<dependency>
	<groupId>com.stripe</groupId>
	<artifactId>stripe-java</artifactId>
	<version>22.3.0</version>
</dependency>
Once the Stripe library is set up, you can use Stripe’s APIs to process payments in your Java Spring application. For every example, in this post, we will use the same Stripe secret key which will be set in application.properties
stripe.secret.key=sk_test_...
charges aPI
Charges API is used to process a variety of payment types, including credit and debit card payments and bank transfers. It enables users to process credit card payments and handle other financial transactions within their own websites or applications.
Steps for processing the charge with Charge API:
- Frontend app sending card data to Stripe
- Stripe returns token
- Frontend app sending a token to the backend
- The backend creates a Charge object and contacts Stripe with the token, amount, and secret key
- The backend then provides a response to the frontend application
Let’s create an example in the Spring Boot application. We’ll start with creating StripeController with one endpoint for processing charge requests.
					@RestController
@RequiredArgsConstructor
public class StripeController {

    private final StripeService stripeService;
    private final ChargeMapper chargeMapper;

    @PostMapping(value = "/charge")
    public ChargeResponse charge(@RequestBody ChargeRequest chargeRequest)
            throws StripeException {
        Charge charge = stripeService.charge(chargeRequest);
        return chargeMapper.toChargeResponse(charge);
    }
}
ChargeRequest DTO will be sent from the frontend and it will contain all data needed for the payment process.
					@Data
public class ChargeRequest {
   private String description;
   private int amount;
   private Currency currency;
   private String stripeToken;
}
Now let’s create a StripeService class with a charge method for processing the payment. Also, we are injecting our Stripe secret key into the service with @Value annotation.
					@Service
public class StripeService {
    @Value("${stripe.secret.key}")
    private String stripeSecretKey;

    @PostConstruct
    public void init() {
        Stripe.apiKey = stripeSecretKey;
    }

    public Charge charge(ChargeRequest chargeRequest) throws StripeException {
        Map chargeParams = new HashMap();

        chargeParams.put("amount", chargeRequest.getAmount());
        chargeParams.put("currency", chargeRequest.getCurrency());
        chargeParams.put("description", chargeRequest.getDescription());
        chargeParams.put("source", chargeRequest.getStripeToken());

        return Charge.create(chargeParams);
    }
}
This example creates a Stripe charge object and sets the required parameters, such as the amount to be charged (in cents) and the payment method being used.
We will also create ChargeResponse DTO to show the status we got from Stripe.
					@Data
public class ChargeResponse {
   public String status;
   public String id;
   public String transactionId;
}
To see the frontend implementation of this example in an Angular application, please visit our post on implementing Stripe in Angular
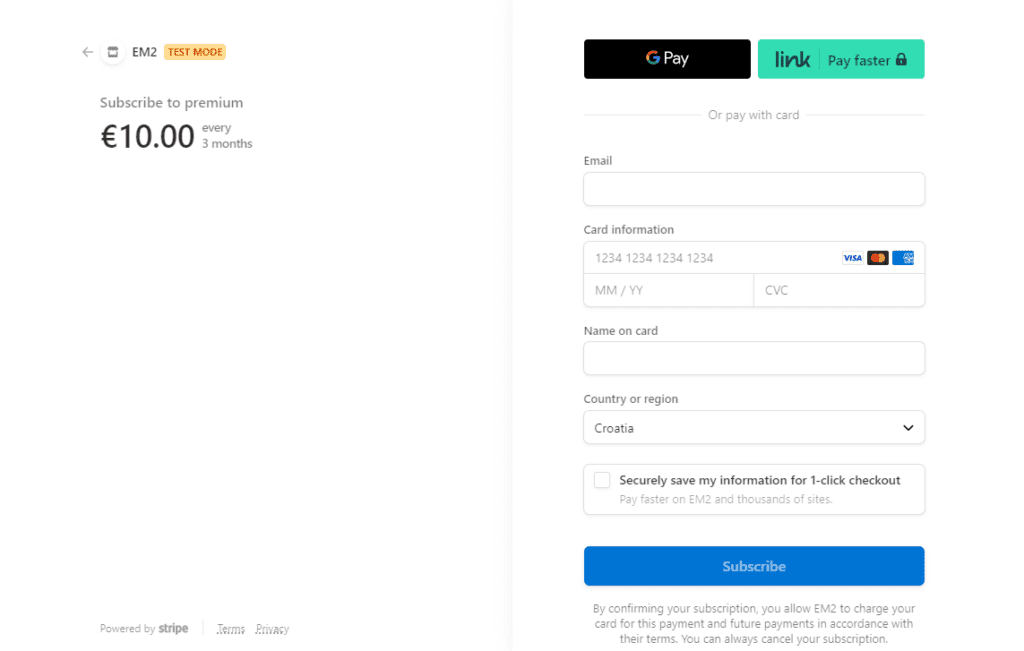
checkout aPI
Another way to accept payments from your customers is to use Stripes Checkout API. It provides a simple, secure, and convenient way for customers to pay for goods or services without the need for developers to build their own payment form.
We’ll first create some products on the Stripe dashboard:
- Log in to your Stripe account and go to the Products page.
- Click the “Create a product” button.
- Enter the product’s name, description, and other details.
- Choose whether the product is a one-time purchase or a subscription.
- Set the product’s price.
- Add any additional details, such as the product’s image or SKU.
- Click the “Create product” button to save the product.
We can access all of our products with Stripe API:
					public List getProducts() throws StripeException {
    Map params = new HashMap();
    params.put("limit", 10);

    List products = Product.list(params).getData();

    return products;
}
Then we can show all products and their prices:
					[
    {
        "name": "premium",
        "prices": [
            {
                "id": "price_...",
                "amount": 1000,
                "recurring": "month"
            }
        ]
    },
    {
        "name": "Small plan",
        "prices": [
            {
                "id": "price_...",
                "amount": 10000,
                "recurring": "year"
            },
            {
                "id": "price_...",
                "amount": 1000,
                "recurring": "month"
            }
        ]
    }
]
Now when we have Stripe products we can use their price Ids for creating checkout sessions. We will create a new method in the existing StripeService.
					public String checkout(String priceId, Long quantity) throws StripeException {
    SessionCreateParams params =
            SessionCreateParams.builder()
                    .setMode(SessionCreateParams.Mode.SUBSCRIPTION)
                    .setSuccessUrl("http://localhost:8080/your_sucess_url")
                    .setCancelUrl("http://localhost:8080/your_failed_url")
                    .addLineItem(
                            SessionCreateParams.LineItem.builder()
                                    .setQuantity(quantity)
                                    .setPrice(priceId)
                                    .build())
                    .build();
    Session session = Session.create(params);

    return session.getUrl();
}
This example creates a Stripe checkout session object and sets the required parameters, such as the payment mode, the number of items being purchased, and the URLs to be redirected to after successful or unsuccessful payment. It then creates the checkout session and returns the checkout URL which can be used for accessing Stripe’s prebuild checkout page.
Of course, this is just a basic example and you can customize the implementation to fit your specific needs. The Stripe Checkout API provides a wide range of options and features that you can use to tailor the payment process to your application.
paymentIntent aPI
Stripe’s PaymentIntent API is a powerful tool that allows businesses to easily process payments within their applications. It provides a range of features and options that make it easy to accept and manage payments, including support for a variety of payment methods and automatic handling of fraud protection measures.
For this example, we will also create one customer.
- Log in to your Stripe account.
- Go to the “Customers” tab and click the “Create Customer” button to open the customer creation form.
- Simply fill out the form with the relevant information (such as the customer’s email address).
- Click the “Create Customer” button to create a new customer.
Let’s create a new method in our existing StripeService
					public PaymentIntentResponse createIntent() throws StripeException {

    String customerId = "cus_your_customer_id";

    PaymentIntentCreateParams paramsIntent =
            PaymentIntentCreateParams
                    .builder()
                    .setAmount(1000L)
                    .setCurrency("usd")
                    .addPaymentMethodType("card")
                    .build();

    PaymentIntent paymentIntent = PaymentIntent.create(paramsIntent);
    paymentIntent.setCustomer(customerId);

    Map paramsKey = new HashMap();
    paramsKey.put("customer", customerId);
    paramsKey.put("stripe-version","2022-11-15");
    RequestOptions options = RequestOptions.getDefault();
    EphemeralKey key =EphemeralKey.create(paramsKey,options);

    PaymentIntentResponse response = new PaymentIntentResponse();
    response.setPaymentIntentClientSecret(paymentIntent.getClientSecret());
    response.setCustomerId(paymentIntent.getCustomer());
    response.setEphemeralSecretKey(key.getSecret());

    return response;
}
This example creates a Stripe payment intent object and sets the required parameters, such as the amount to be charged (in cents), the payment method being used and currency. Also, we are creating EphemeralKey which is used to securely retrieve card information from the Stripe API. For creating EphemeralKey we need the customer Id and stripe API version that will be used also on the client side.
Our example method is returning data that are needed for the client side
					@Data
public class PaymentIntentResponse {
   private String paymentIntentClientSecret;
   private String customerId;
   private String ephemeralSecretKey;
}
Overall, the PaymentIntent API is a powerful and feature-rich tool for businesses looking to integrate payment processing into their applications. Its versatility, security, and range of features make it an excellent choice for businesses of all sizes.
For the frontend implementation of this example in a React Native application, check out our post on integrating Stripe in React Native.
conclusion
Overall, integrating Stripe into a Spring Boot application is a simple process that can greatly enhance the functionality of your application. By leveraging the power of Stripe, you can easily accept and process payments from your users, making it easier to run and grow your business.